Saturday, November 11, 2017

The Art of Character Association


Disclaimer:

Most of the projects that I will be doing are for a game that I am developing on my own code named Project Ninjio. In short, the game is a story action driven role playing game (common referred to as an action RPG). It features 2 uniquely styled areas, one in which the cities are built to flow along with nature, and the other where the cites are hyper futuristic. The game is set in a futuristic China, where after a large war, the country is split into the two settings described above. The game is built in the Unity 3D game engine.

The Art of Character Association

Introduction

One thing that I have been having issues with in Ninjio is how to have players memorize and associate the names of the characters to their personalities and such. This is hard because I am adamant in keeping the original Chinese names unaltered in the final game, even though they are fairly difficult to pronounce correctly. I have toyed around with some ideas and have came up with a few methods for getting the name to image association correct in players minds.

How to be memerible, the right way

Image result for borderlands character introduction
Borderland's style of character introduction
One thing that I found common in many video games, like Telltale Game's Borderlands series, is a way of quickly giving off some sort of information about the character along with some sort of memorable line that the character either says a lot or they center actions around. Borderlands does this in a very obtrusive way, with the game pausing, zooming in the character, the character saying some sort of silly voice line, and then the game displays their name along with a line that the character typically uses as their motto for their actions in the game.

Another method that I saw a lot in other video games to display character information is to have a screen that the players can access at any point in the game. Games that use this method typically just display factual information like the character's age, height, width, attack information, and any other information that the player may find useful. While this can display lots of factual information, I only know a few games that use this style of display to show character personality information, however I plan on using and displaying this information differently in Ninjio.

Character profiles in Ninjio

What I am planning for Ninjio's character profiles is a hybrid between the two methods that I outlined above. I plan on taking the memorable lines, the character portraits and the silly voice lines that Borderlands has and combining them with some other information about the character's personality or history (see sketch). These profiles will only be available for the player for the 7 main characters that the player will be interacting with throughout the story.

Image result for incentivizing player actions
Incentivizing? I think so!

Incentivizing the player to view these profiles

As the game is currently written, the player (playing as the main character of course) meets the villain early into the story and the main character's mentor very early into the storyline. I think that it would be appropriate for the player to then be prompted, hopefully in a manner that seems natural to the player, to open up the character profiles for the main character, the villain, and the main character's mentor. As for the rest of the cast, including Bing Nu, I have a scene where the main character is required to go around and introduce himself to the rest of the cast (minus one!). I think that when the players introduce themselves to these characters, their profiles unlock in the character profile menu. The last character, I will just wait until he hacks into his own profile to unlock it.

This week's work log:

Monday November 6th: Made a run cycle for Bing Nu
Tuesday November 7th: Made a valiant attempt to get the foot IK working, which ultimately failed
Wednesday November 8th: Worked more on foot IK and it seems to work well
Thursday November 9th: Started work on one of the weapons, the Omega Blaster

Friday November 10th: finished modeling the Omega Blaster, ultimately got rid of it for various reasons
--. -. .. --.. .. .-.. .- .. - .. -. ..     .-.. --- -.-. --- - --- .-. .--.     -. --- .. - ... .- -...

Friday, November 3, 2017

End of Marking Period 1 Blog Posts Peer Review

End of Marking Period 1 Blog Posts Peer Review

After reviewing some of my peer's end of marking period 1 blog posts, I have learned about many of my classmate's projects. Many of these projects interest me greatly.

My friend Keaton's project was the first to peak my interest. He is currently working on an environment for a virtual reality (VR) animation that he is doing, see the video that I have on this blog for more information about VR animations. The environment he is working on is strikingly similar to the flight deck of the Star Ship Enterprise found in the Star Trek series. This fact alone is enough for me to instantly fall in love with it, but Keaton is also putting a lot of time into making sure that every square inch of his space ship is filled to the brim with details, as anyone can go and look anywhere in the scene.

Another one of my friends Michael is currently working on the scenery and initial modeling for characters in a, supposedly, action packed animation. I have been friends with Michael for the longest time, since middle school actually, and I have seen the development of most of the characters that he wishes to have in this animation and the story line and action sequence of this animation come to life over the years. I hope that this animation turns out as good as he has been telling me, because I feel partially connected to both the characters and he animation as a whole.

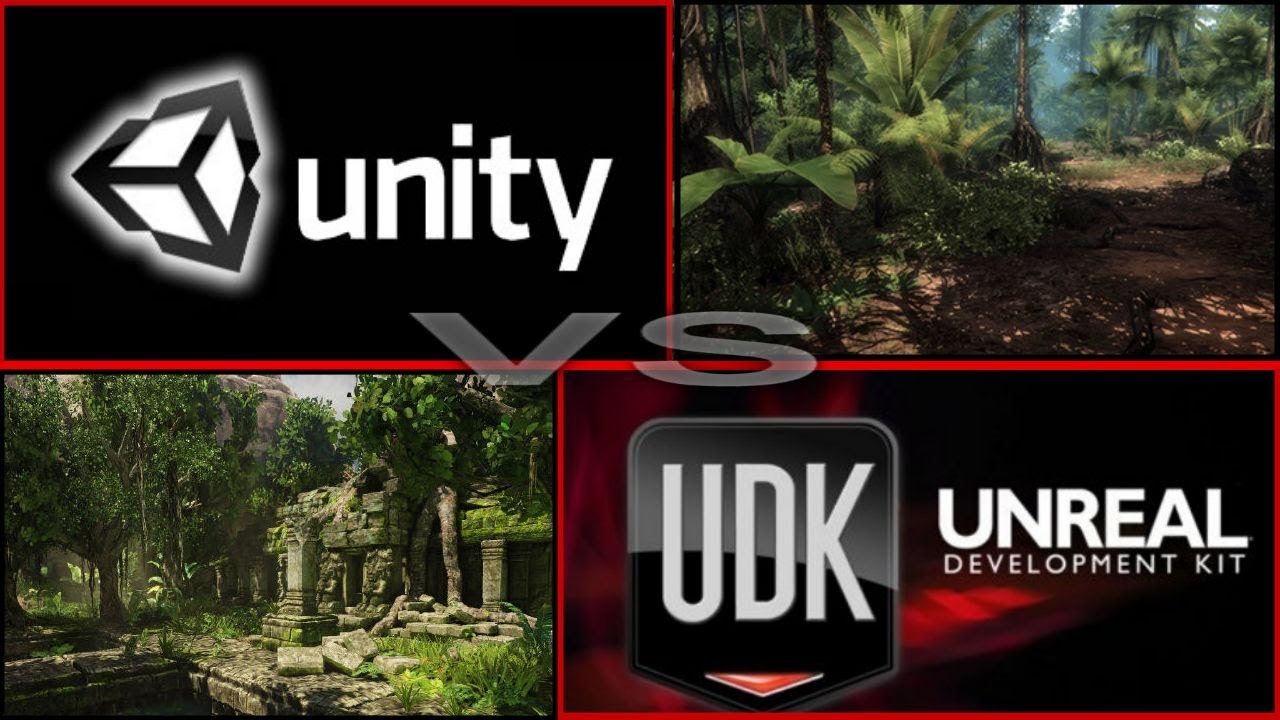
Image result for unreal engine vs unity
Unreal Engine is another game engine just like Unity!
Unreal is used more due to how easy it is to make a game in it,
however Unity is slightly better thanks to it's better licensing policies.
There are two more people whose projects have stood out to me. Bado is currently working on a video game inside of Unreal Engine 4 (another game engine). From the sounds of it, the game play will be very similar to Ninjio. The other person whose project really spoke to me was Garet's. He is currently working on bring a fantasy world to life. This world of his has apparently been around since he was in elementary school, quite like how Ninjio's world was created when I was a junior in high school. I wish both of these people the utmost luck and hope that their projects exceed any standards they set forth for themselves.

This week's work log:

Monday October 30th: View a few classmate’s end of marking period blog posts
Tuesday October 31th: Started working on Bing Nu’s animation
Wednesday November 1st: Finished up the first idle animation for Bing Nu
Thursday November 2nd: Finished another idle animation for Bing Nu
Friday November 3rd: Made a walk cycle for Bing Nu and played around with IK in Unity

Saturday, October 28, 2017

The Art of Optimization

Disclaimer:

Most of the projects that I will be doing are for a game that I am developing on my own code named Project Ninjio. In short, the game is a story action driven role playing game (common referred to as an action RPG). It features 2 uniquely styled areas, one in which the cities are built to flow along with nature, and the other where the cites are hyper futuristic. The game is set in a futuristic China, where after a large war, the country is split into the two settings described above. The game is built in the Unity 3D game engine.

The Art of Optimization

Introduction

It has been my goal to insure that Ninjio is the best experience that I can offer to its players. I had many smaller goals that I have for Ninjio to insure this high quality experience, however one of them (and the most important one to the gamer inside me) is making sure that the game will run at a constant 60 frames per second (FPS) or higher at all times on all sorts of hardware.

60 whats?

Without diving too far into the technology that we all use on a nearly daily basis, a frame in terms of a computer is the image that the computer is outputting to your monitor or display. It is well documented that the human eye can only see around 30 to 60 of these images per second, any lower number and the image would look choppy while any higher number would result in a similar looking image while wasting computing power, which is not ideal. Gamers, like myself, can definitely "feel" the difference between 60 fps and it's lower counterparts. Most games these days strive to run at this 60 fps threshold, however most fail (especially when running on consoles) and run at around 30 fps. 

So what are the benefits of this higher frame rate?

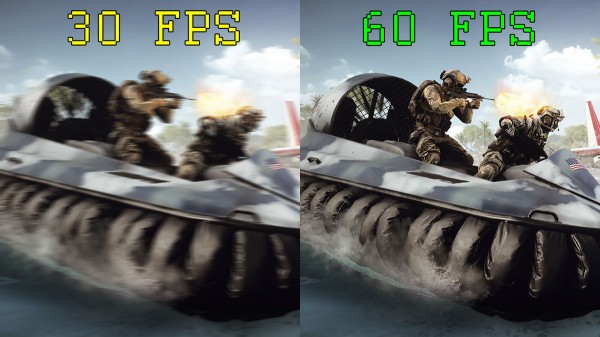
Image result for frames per second
Look at the difference, the 30 FPS image looks smeared
compared to the 60 FPS one.
In short, the higher the frame rate (and therefore higher fps) the faster you see the result of your action, say moving your mouse or pressing a button. This is generally what you want in games where there is a lot of action going on at a time, like Ninjio. Another benefit to this higher frame rate is that images do not look blurry and smeared when you pause the game, as there are more images being outputted to you monitor.

The challenges of achieving higher frame rates

In short, there are 2 ways to achieve higher frame rates, by either optimizing your code or optimizing your art. While optimizing your code could yield a better result on a per optimization basis, it is generally harder to do. Art, on the other hand is very easy to do. It is important to optimize your art as best as you can, even while you are creating it.

How to optimize your art

Related image
Not a too much changes visually here
One easy way of optimizing art in video games is to make sure you are using the least amount of vertices (or points in 3D space) as you can. By doing so and asking questions like "Do I really need a ton vertices to make a sphere when I could do it in much less vertices and have it look the same", you can optimize different pieces of art very easily. Another method is to remove any faces (3 or more vertices put together to make a side of an object) that you know that players are not supposed to see. This could be like the back of a building facade that players cannot see in game or the bottom of a building that would normally be buried under the ground.  These methods are very simple and easy to do, however sometimes you do need a high polygon count on an object or sometimes you do need all of the faces to be filled in, it is situations like this where different programing tricks come in handy.
Image result for level of detail
Level of detail (LOD) in Team Fortress 2

One programming trick is level of detail, or LOD for short. It is the process of making it so that the game engine gradually reduces the amount of detail in the object as object gets farther away from the player. This method has to be programmed, but the results of it can vastly improve the performance of the game.
Image result for draw call batching
An example of draw call, look at how the
 trees are rendered together in a single
graphics call, as shown by the grey box.
Another programing trick, one that is fairly easy to do inside of the Unity3D engine, is draw call batching. This trick involves telling the computer that instead of treating each object as its own separate entity upon the rendering of the scene, instead the engine tells the computer that a certain group of objects should be rendered at the same time, thus saving processing time on the computer's side. This trick only works well when you have objects that are static, like building and pieces of the environment that do not move during gameplay.
Occlusion culling in Horizon: Zero Dawn
One last programming trick is called occlusion culling. In short, it makes it so that the computer only renders what the camera inside of the game can see. Normally the computer will render every single object in the scene regardless of if it is onscreen or not. With occlusion culling, the game doesn't render anything that the player cannot see through the camera, so objects behind the player are not even processed and rendered at all. Occlusion culling is used heavily in some of the earlier 3D games like the original Crash Bandicoot. However this method has become popular in modern games like Horizon: Zero Dawn as the method allows for a higher visual fidelity, especially in games where the worlds are large and expansive. 

Saturday, October 14, 2017

How to Model: Hair, the Anime Way

Level of detail (LOD) in Team Fortress 2

Disclaimer

Most of the projects that I will be doing are for a game that I am developing on my own code named Project Ninjio. In short, the game is a story action driven role playing game (commonly referred to as an action RPG). It features 2 uniquely styled areas, one in which the cities are built to flow along with nature, and the other where the cites are hyper futuristic. The game is set in a futuristic China, where after a large war, the country is split into the two settings described above. The game is built in the Unity 3D game engine.

How to Model: Hair, the Anime Way

Image result for my hero academia
The characters of My Hero Academia

Introduction

While working on the model for Bing Nu, I have struggled a bit to make the hair for her look both realistic yet have it fit in with the art style of Ninjio. I have watched numerous tutorials online, however most result in a hyper realistic hair style and shape which would not suite the pre-defined art style of Ninjio. While watching a little bit of Boku No Hero Academia (My Hero Academia in English), one of my favorite animes to watch, I realized that the way hair is done in anime is quite different compared to other art forms.
Unlike other art forms which use individual strands and strokes of hair to make the hair flow and act realistic, anime hair tends to clump the pieces of hair together in one shape. This results in anime hair being more expressive of the character than that of traditional art forms where the hair is just there. Another benefit of using this anime hair style is that the hair on the character could not follow the laws of physics and still look good.
Since this discovery, I have developed a method for modeling this style of hair on characters inside of the Blender 3D modeling programing.

The steps

Step 1) Start out with the head that you wish to cover in hair.
Step 2) Create two bezier curves by pressing Shift-A and then to Create Curve and then to Bezier Curve.
Step 3) Create a bezier circle by pressing Shift-A and then Create Curve and then to Beizer Circle
Step 1
Step 2 (and 3 I guess)

Step 4


Step 4) Under the Shape tab of the Curve Options editor window, set the preview resolution of the bezier circle to 2. Then rename the circle to something that you will remember, I use Hair Bevel Object for mine. Move the circle somewhere in the scene where it will not be in the way of the rest of the modeling.
Step 5) Using one of the bezier curves, go into Edit Mode on it, move the control points and the handles around until they match the ones show in step 5's image. Rename the curve to something you will remember, I use Hair Taper Object for mine. Move the curve somewhere in the scene where it will not be in the way of the rest of the modeling.
around with the handles to make it look like
Step 6) Using the other curve, go into it's Geometry Options under the Curve Options editor window and set the Taper Object to the bezier curve you made in step 5 and the Bevel Object to the circle you made in step 4.
Step 5

Step 6
Step 7) Now position the bezier curve that you made in step 6 so that the control points are where you want your piece of hair to start and end. Maneuver the handles of the curve to make the piece of hair fit along the head. You may want to resize your Hair Taper Object and Hair Bevel Object 
Step 8) Repeat steps 6 and 7 until you are satisfied with the results.
Step 9) Select all the piece of hair and then press Control-J to join all the separate bezier curves into one object
Step 7


Hint: use the mirror modifier to decrease the time that you spend modeling the hair!

Final Results


A monkey with hair, because why not?

 This week's work log:

Monday October 9th: Day Off: Columbus Day
Tuesday October 10th: Started work on Bing Nu’s hair, most ended work ended up scrapped
Wednesday October 11th: more work on Bing Nu’s hair
Thursday October 12th: Finalized work on Bing Nu’s Hair
Friday October 13th: Made hands for Bing Nu, added finishing, modeling, touches

Friday, October 6, 2017

The Art of Belonging

Disclaimer:

Most of the projects that I will be doing are for a game that I am developing on my own code named Project Ninjio. In short, the game is a story action driven role playing game (common referred to as an action RPG). It features 2 uniquely styled areas, one in which the cities are built to flow along with nature, and the other where the cites are hyper futuristic. The game is set in a futuristic China, where after a large war, the country is split into the two settings described above. The game is built in the Unity 3D game engine.

The Art of Belonging

Wait, what does that mean?

Yeah, I know that the title may seem very awkward at first, but I assure you that it will make sense. The title of this post should really be The Art of Belonging to, Identifying with, and Representing a group of people though visual means but I don't think that it flows quite as well. What I am trying to answer here is how one can visually be identified as part of a larger group.

So what does this have to do with your game?

The characters in Ninjio are varied, ranging from a ex-prince set out for revenge to a hacker trying to install the truth. This variety in both motives and physical appearance raised an interesting question for myself to answer, how do I make sure that they all seem like the belong together as part of a common force trying to remove evil? There are many ways of answering this question, ranging from uniforms to common symbols found on them.

Image result for star trek
The cast of Star Trek in their character's outfits.
Notice how they all have the same, uniform, look to them.
I originally planned for each of the characters in Ninjio to wear a uniform, however I have since moved away from that idea as it would limit the amount of personality that I could add into a character. I could also do something like in Star Trek where the character's outfits are similar to each other with only the colors of them changing, however this once again would limit the personality that I could infuse into a character.

The other option is for each of the character to have a symbol or object that all the characters have on them in some form or fashion. I think that this route would be best as it would not restrict my designs for the characters as long as the symbol is something small , like a flower.

What is that symbol then?

The design for Bing Nu, note
the magenta gemstones throughout
her design
The symbol that I am planning on using for the characters found in Ninjio is a gem of some sort. In my plans for Bing Nu's design, I included a gem stone in her outfit. This was originally included in her design as part of one of my friend's idea to have the personalities of the characters be symbolized in the colors of the clothes that they wear based off flowers and what different types of flowers symbolize (see image for more information).
A chart of what each color of
flower symbolizes

I feel that the gem stones could be used to symbolize different things based on their colors and where they are on the character. For example, I plan on making the villain in the story wear a black gem on a ring positioned as far away from the heart as possible to help convey the fact that he is a heartless ruler.

This week's work log:


Monday October 2nd: Finalized the shape of Bing Nu’s body

Tuesday October 3rd:  Started work on Bing Nu’s head
Wednesday October 4th: Halfway done shaping the head of Bing Nu
Thursday October 5th:  Finished the head of Bing Nu and attached it to the body
Friday October 6th:  Day Off: Teacher In Service, some initial work on the next character's sketch